Rode (Røde) VideoMic - Take Apart

Last Week I bought myself a Rode VideoMic. The first thing I did was a quick test with my EOS 5D Mark II. It worked fine like expected. But hey, I'm an engineer ;-) So let's take it apart!
Removing the windshield is easy. Getting it back on afterwards not. Be careful when removing or reattaching it again. It can easily break if you are not careful enough. After removing the windshield and the rubber things, you'll end up like this:

Unmounting the shoe mount is a no-brainer as well. Just remove the two screws at the bottom. Remember the direction of the mount. The two holes for the boompole are located at the back end of the mic.
Unscrew the four screws located at the thin end of the microphone. You are now almost ready to separate the two plastic housing parts. Just a short struggle with the sticky label at the back and you're done. Start removing this label (I used a scalpel and tweezers to damage the label as least as possible) at the lower left corner when you are looking at it from the back of the mic. Only half of the label needs to be separated from the housing. Tadaa:

Here is a picture from another angle so that you can see how much label glues to the left microphone part:

Unscrew the three remaining screws, remove the light guide from the two-color LED and you can remove the PCB.
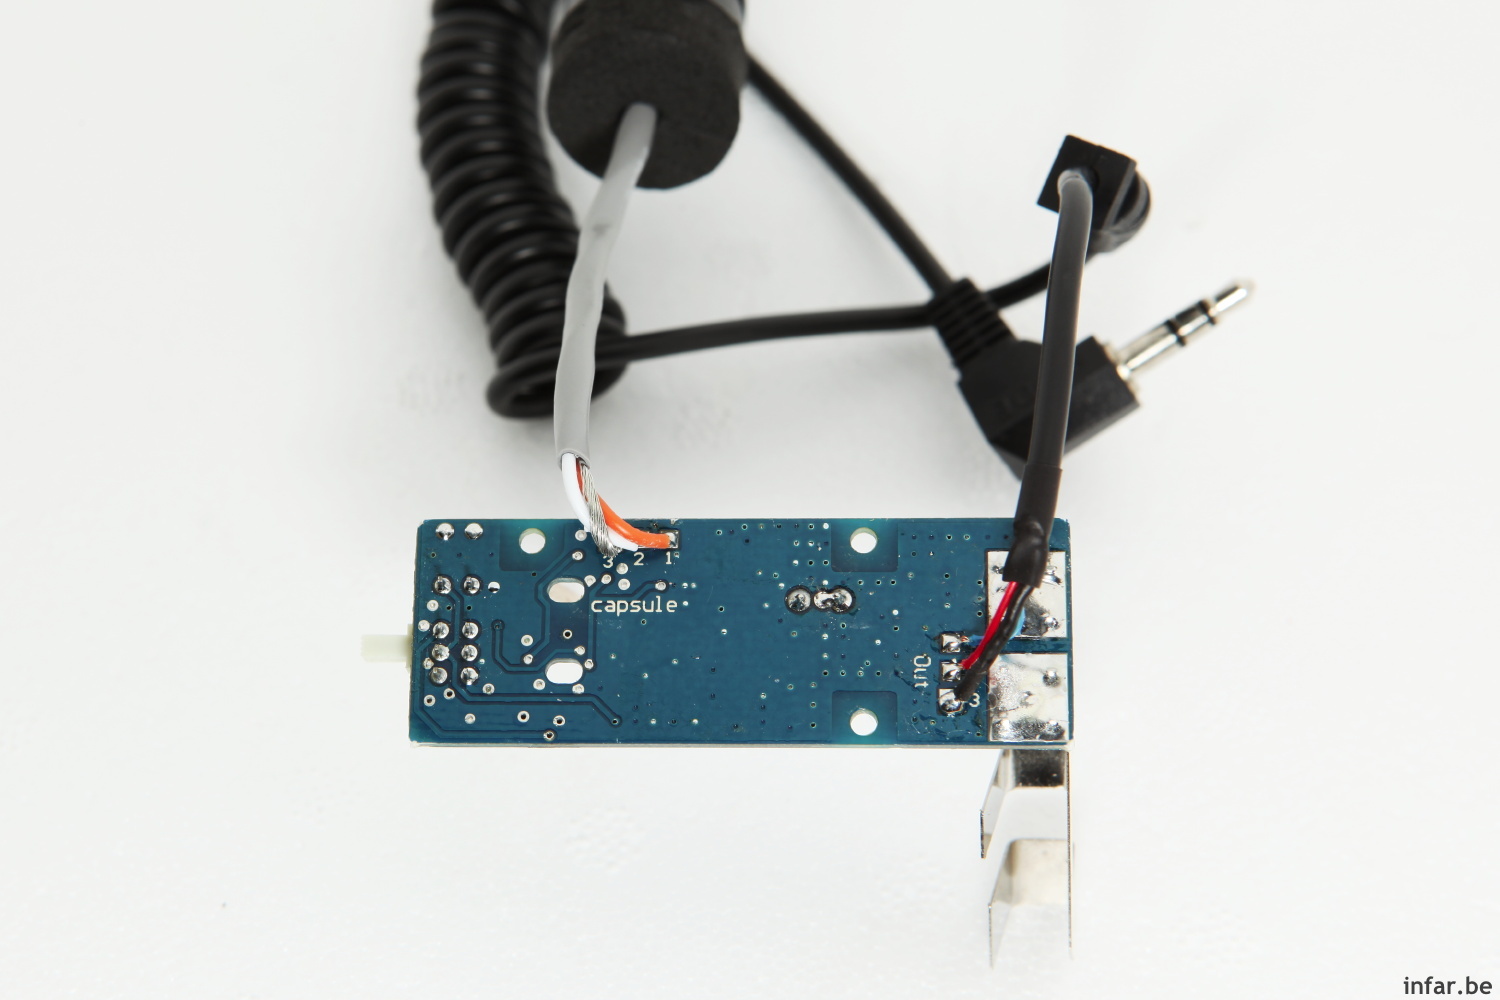
Nothng special at the back:
But always interesting is the component side:

Not big enough? okay, here you are:

Reassembling is almost as easy as taking apart but I can give you some hints. Place the two meshes and the paper in between to the top of the mic like this:

The two brass things go in like this:

And finally make shure you mount the inner part of the microphone so that you can look through this hole:

You're done!
Now some food for the search robots: This article is about disassembling and reassembling the RØDE VideoMic. You'll see some nice high resolution pictures of the inside PCB of the RØDE VideoMic. Unfortunately I forgot to note the manufacturer and type of the microphone capsule. Can anyone please help in the comments?
Wenn jemand das RØDE VideoMic auseinander nehmen möchte, ist er hier an der richtigen Adresse. Bilder vom Innenleben und von der Platine sieht man hier. Außerdem fällt mir gerade auf, dass ich vergessen habe den Hersteller und die Bezeichnung der Electret-Kapsel aufzuschreiben. Dammit! Aber vielleicht kann man auch an den hochauflösenden Bildern auf das Anpassnetzwerk an die 200 Ohm Ausgangsimpedanz schließen.
